TL;DR
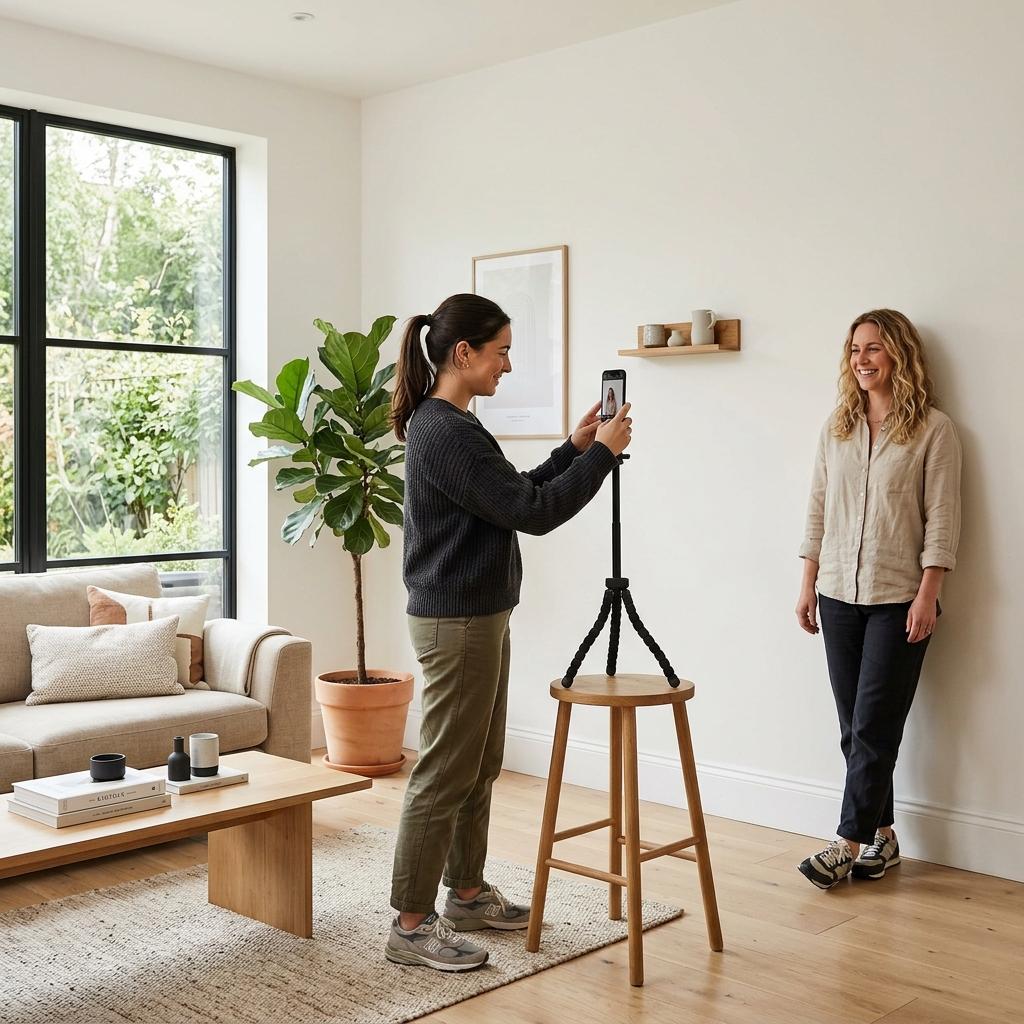
Stand 1–2 metres from a plain white wall, use natural window light from the front, hold your phone at eye level with the rear camera, turn off portrait mode and beauty filters, keep a neutral expression, and use a tool like IDPIC to crop and verify compliance.
Approved vs. Rejected: Photo Examples
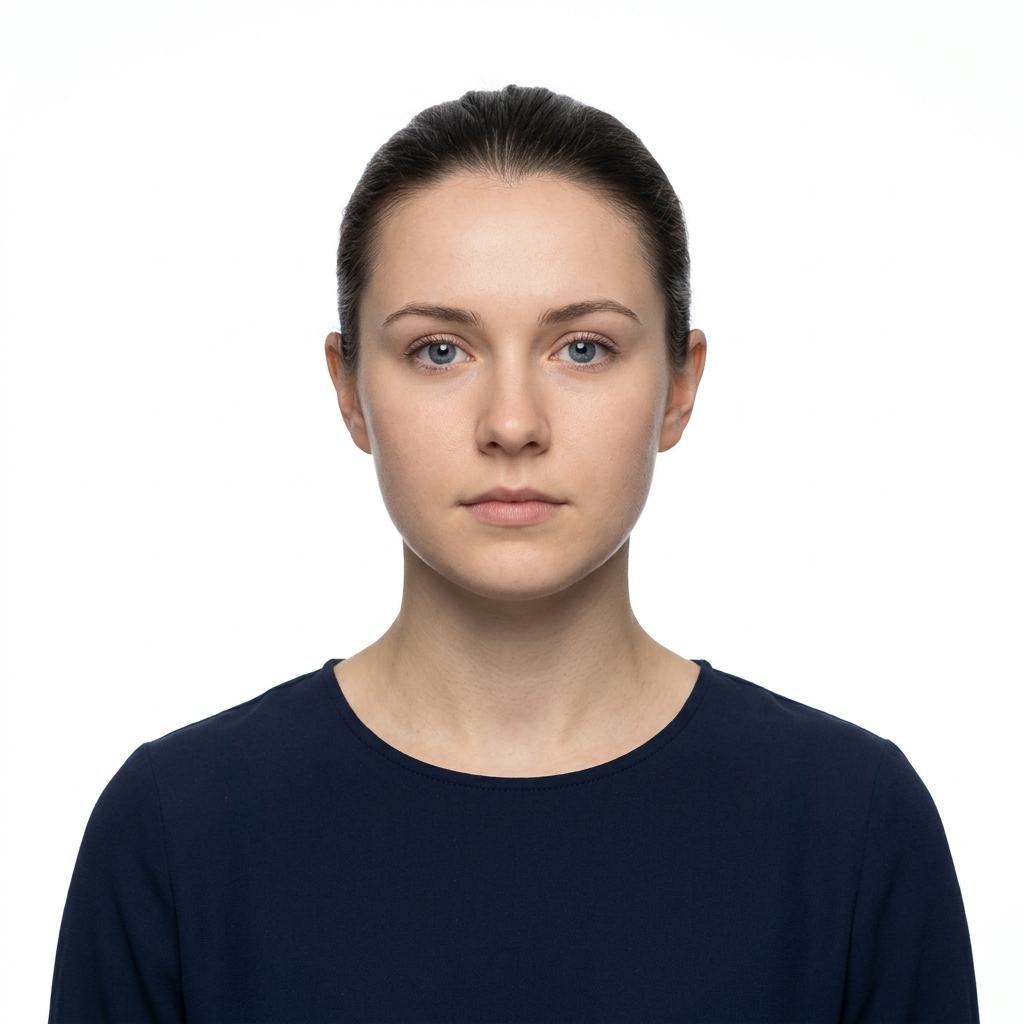
- Neutral expression, mouth closed
- Even lighting, no shadows
- Pure white background
- Eyes clearly visible
- Head centered and upright
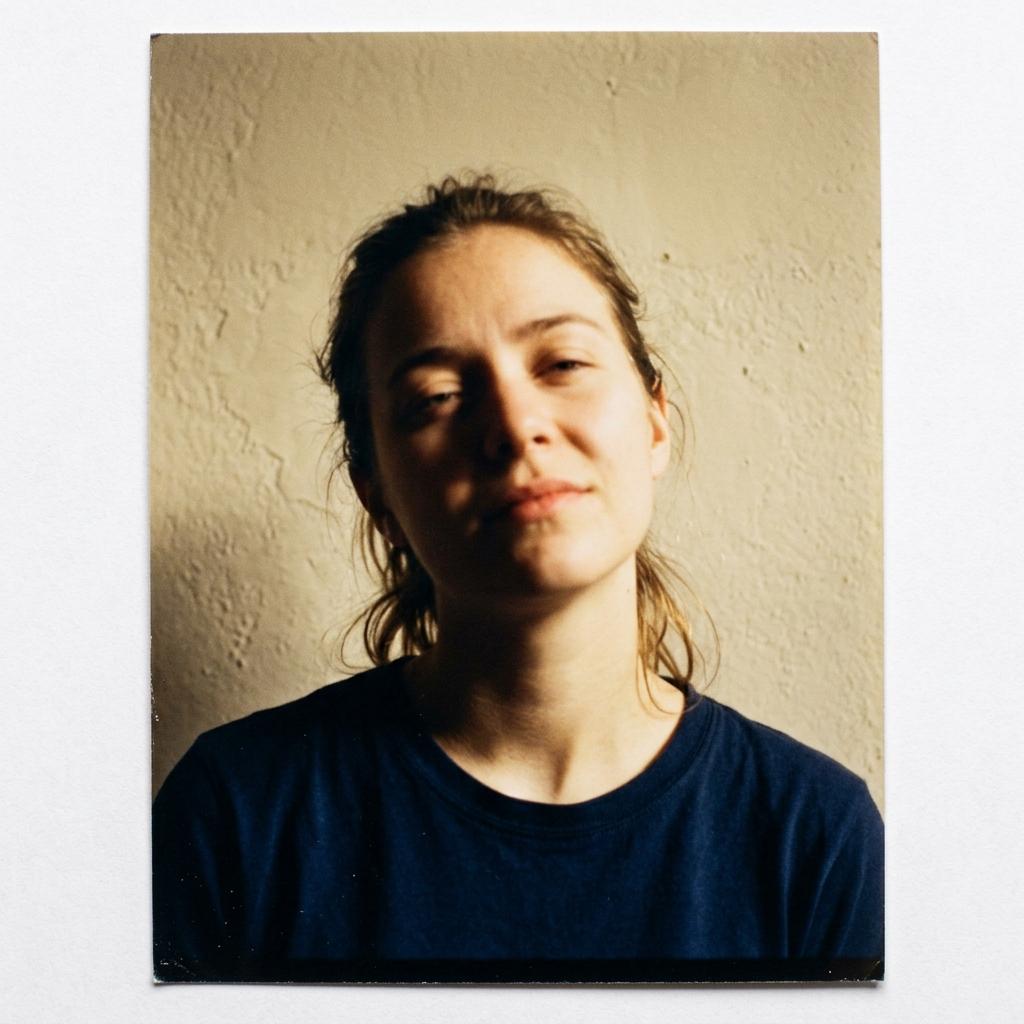
- Harsh shadows on face
- Non-white textured background
- Head tilted to one side
- Squinting eyes
- Yellow color cast from indoor lighting

- Direct forward gaze
- No glasses or accessories
- Clear contrast with background
- Sharp focus on face
- Appropriate framing and crop
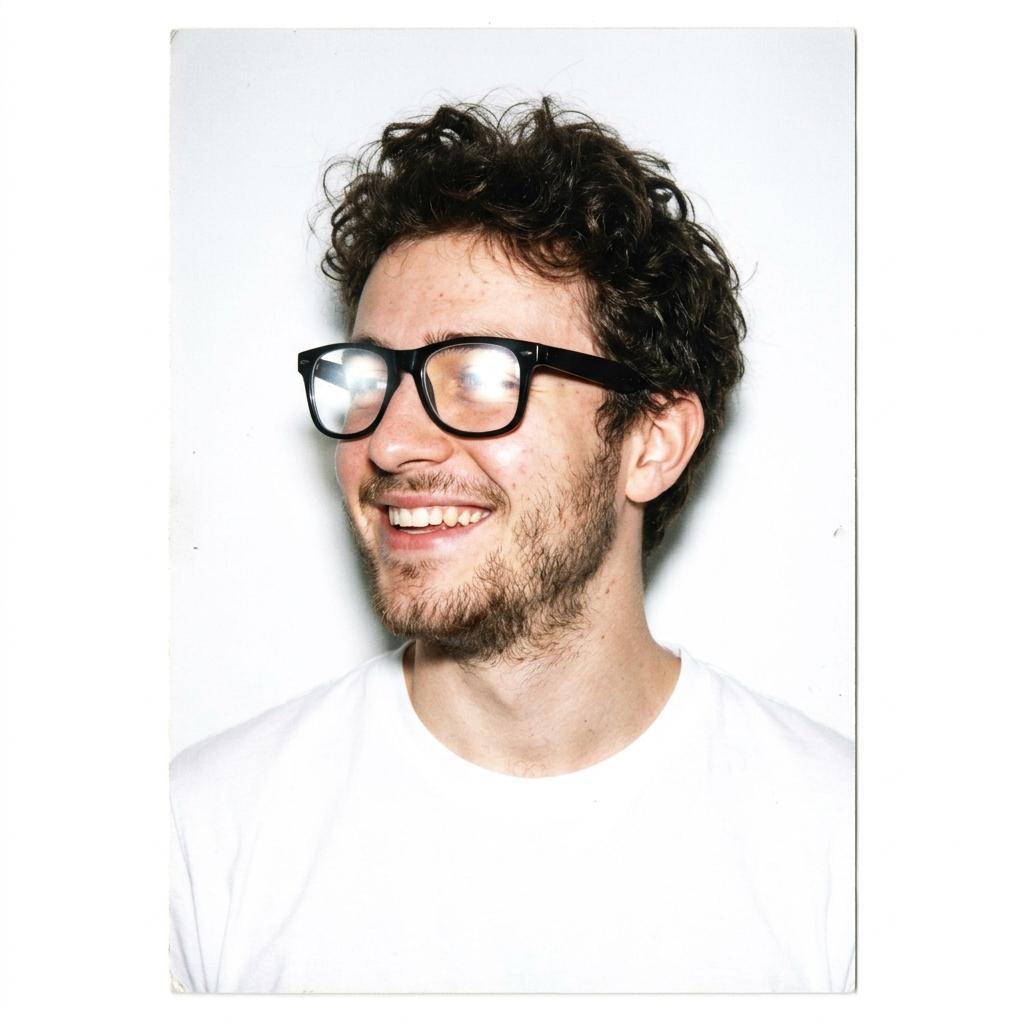
- Glasses with visible lens glare
- Smiling with teeth showing
- Head turned to the side
- White shirt blends with background
- Not facing camera directly
Step 1: Prepare your background
Find a plain, uniform wall in white, off-white or very light grey. Avoid textured wallpaper, patterned curtains or coloured surfaces. If you don't have a suitable wall, tape a large sheet of white poster board or a white bedsheet behind you. Make sure the background is wrinkle-free and covers the entire frame behind your head and shoulders.
Step 2: Set up lighting
Natural daylight is your best friend. Stand facing a large window so the light falls evenly on your face. The window should be in front of you, not behind you or to the side. Avoid direct sunlight, which creates harsh shadows. Overcast days provide ideal, soft, even lighting. If shooting at night, use two balanced lamps placed at 45-degree angles on either side of your face — but natural light is always preferred.
Step 3: Position yourself and the camera
Stand 1.5 to 2 metres from the background to avoid casting a shadow on the wall. Have someone hold the camera at your eye level, or prop it on a stable surface. The camera should be about 1.5 metres from your face. Frame the shot to include the top of your head down to the top of your shoulders. Centre your face horizontally. Stand straight, look directly at the lens.
Step 4: Camera settings and taking the shot
Use the rear camera for higher resolution. Turn off portrait mode, beauty mode, HDR enhancements and all filters. Set the flash to off — flash creates uneven lighting and red-eye. Use the timer function (3–5 seconds) so you can put the phone down and avoid camera shake. Take multiple shots and choose the sharpest one with the most even lighting.
Step 5: Crop and verify
Upload your best photo to IDPIC. The tool automatically crops to the correct dimensions, adjusts the head position, removes the background if needed, and checks compliance against the rules for your selected document type. Review the result before downloading.
Key data at a glance
| Parameter | Recommended | Avoid |
|---|---|---|
| Camera | Rear (main) camera | Front (selfie) camera at close range |
| Distance to face | 1.2–2 m (4–6 ft) | Less than 0.5 m (arm's length selfie) |
| Distance to wall | 1.5–2 m (5–6 ft) | Standing against the wall |
| Lighting | Front-facing natural window light | Overhead fluorescent / flash / backlight |
| Portrait mode | Off | On (blurs background edges) |
| Beauty / filters | Off | Any enhancement or filter |
| Flash | Off | On (causes shadows and red-eye) |
Frequently asked questions
Can I use a selfie for my passport photo?
Technically you can use a front-facing camera, but rear cameras produce significantly sharper images. If you must selfie, use a tripod or prop the phone on a shelf and use the timer. The most common rejection reasons from selfies are: too close, distorted proportions, and visible arm/phone shadow.
What if I don't have a white wall?
Hang a large white bedsheet, poster board or white fabric behind you. Iron or stretch it flat so there are no wrinkles or shadows. Some people use a white shower curtain rod setup.
Can I take my baby's passport photo at home?
Yes. Lay the baby on a white sheet on a flat surface, face up. Stand directly above and shoot straight down. Make sure both eyes are open and no hands or toys are in frame. IDPIC supports infant photo processing.
Real-world scenario
Busy parent: Taking a baby's passport photo at home
Maria needs a passport photo for her 8-month-old but the baby won't sit still at a photo studio. She lays a white fitted sheet on the floor, places the baby face-up in natural window light, and stands on a chair to shoot straight down with her phone's rear camera. After several attempts — some with eyes closed, some with a hand in frame — she captures one with both eyes open and a neutral expression. She uploads it to IDPIC, which crops it correctly and verifies it meets infant photo requirements.